Capitalism - Feudalism without the Kings
Tax the Rich
Knitting Friday
 |
| #1 New top |
Since I mentioned my dearth of new projects last week this is the only one I've started. It's in Knit Picks fingering Stroll. (Stroll is a lovely feeling washing wool which, I discovered late in the game, will not splice. Apparently, that's a feature of washable wool. However, since KP washable must be chemically treated, you can place the joining ends in boiling water which removes the chemical and then you can splice. Don't get burned though.)
As you can see I'm using my ubiquitous Row 1: *YO, K2tog*, Row 2: *K* pattern again. That's because I know two skeins (400+ yards) will make a top and I'm too lazy to swatch to see if another pattern will work.
Two things about this top: 1: The armholes had to have a loose bind-off because I was only binding off 30 stitches. I used the elastic bind off at:
It's not rocket science to learn and it makes an even, attractive, elastic bind off.
2: I really worked hard to eliminate gaps at the underarm.
Here's an example of the problem in Picture #2. You can see those two single strands of yarn on the right side in the middle of the picture.
And you can see the yarn just above them at the underarm look more substantial. From comments on Ravelry, this is a very common and unavoidable design problem which is in all of my tops before I figured out the fix.
 |
| #2 Messy underarm |
 |
| #3 All fixed |
Picture #3 shows the top I'm working on now and you can see there are no single threads at the armhole as there are in Picture #2.
I fixed this by: I worked one round where I cast on the stitches for the underarm (10 sts each armhole) then on the next round when I reached the problem area, I used a crochet hook to pick up a thread from the "bar" of yarn at the top and perpendicular to the single threads above. (Sorry, I should have used a pointer with Picture #2) but follow those two single yarn threads up where you see a thicker column of yarn which is perpendicular to them. Just grab a yarn thread from that column and work it through both single thread and place it as an extra stitch on your needle.
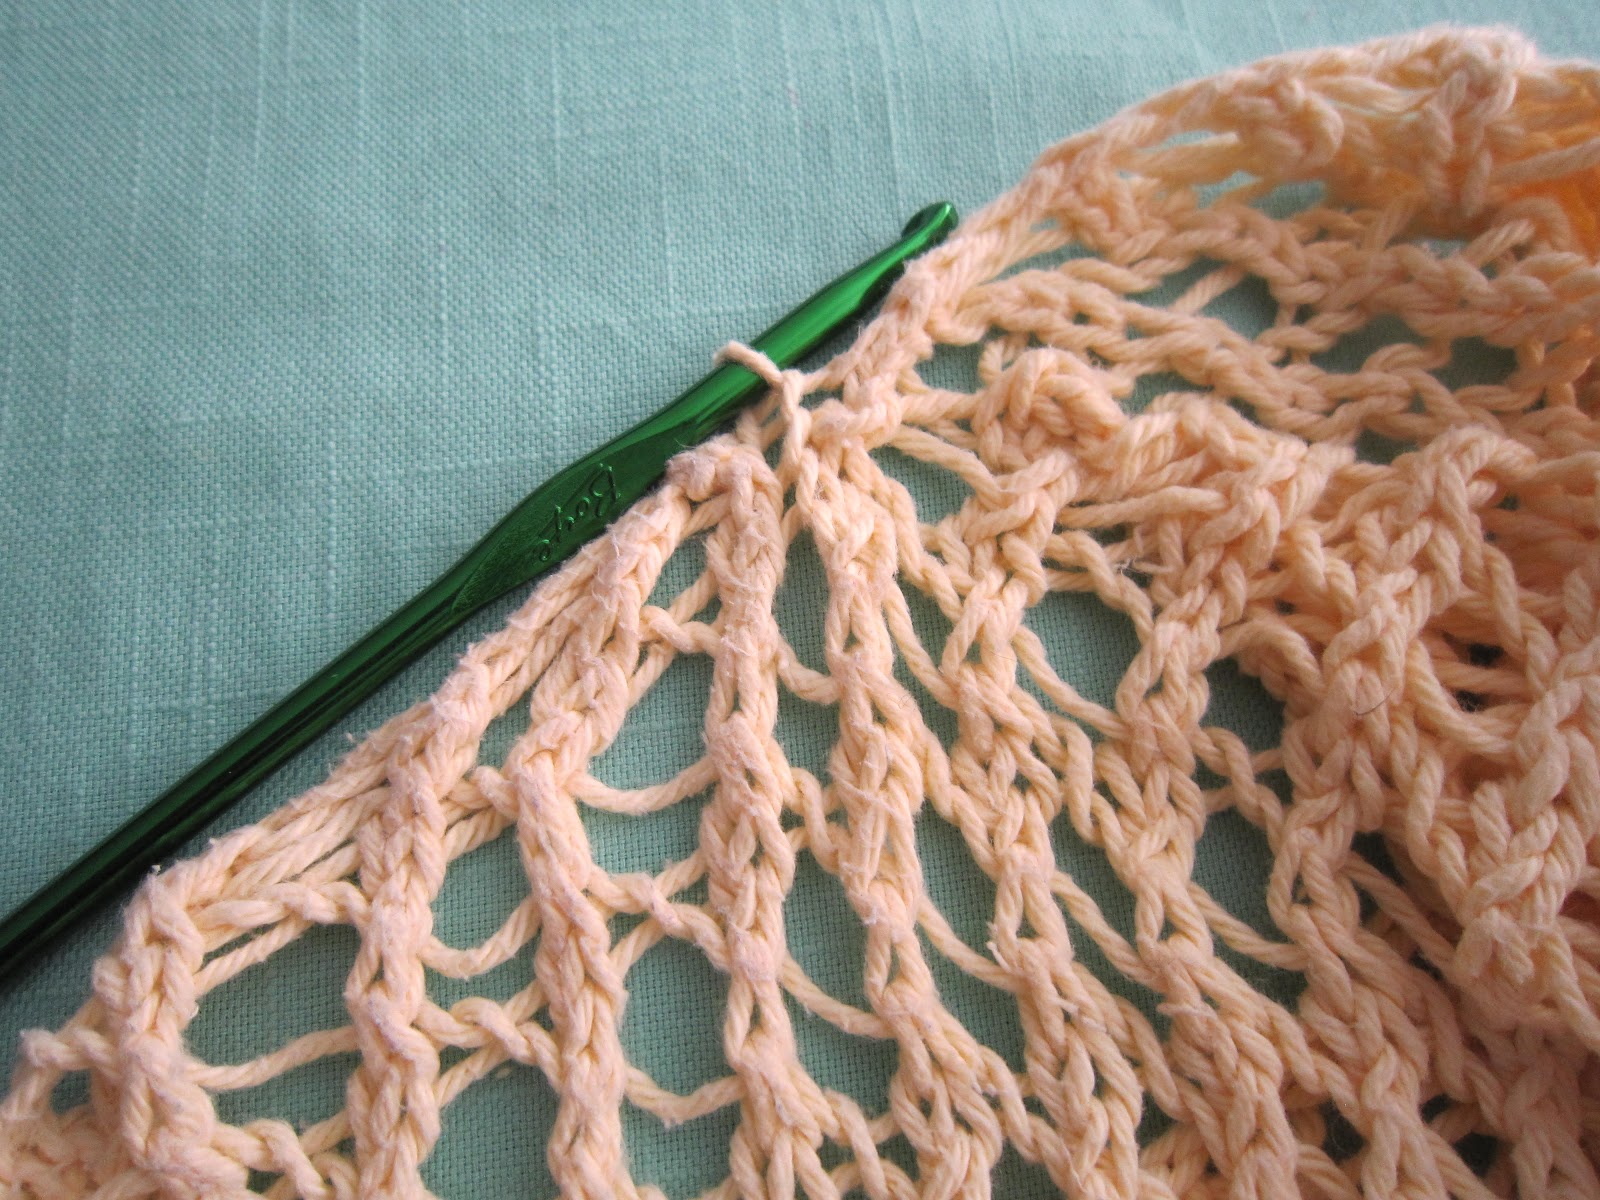 |
| #4 The fix |
In Picture #4, you can see the fix in progress and the area in Picture #3 is not loose or open anymore. Once the stitch is on the needle, knit it together with the next stitch. You usually have to do at the same place for both armholes and sometimes when you return to this spot on the next round you have to repeat the process. Since the yellow top shown here was already done; I made the fix then tacked that stitch you see on the crochet hook (#4) to the inside of the top with yellow thread.
I know I've mentioned this armhole problem before but I hope these pictures are more helpful.
In keeping with my fix-it mode, I have another one for you: the stockinette stitch (st st) roll.
 |
| #5 The dreaded roll |
Anyone who has knitted a st st pattern will, unless the st st roll is a design element, read something like: CO x sts and work 3" in rib (or seed or garter, etc.) Change to larger needles and work in st st for x inches. Because, if you don't make this hem, stockinette will curl; its the nature of the stitch.
Yesterday, I was moving summer tops to make way for winter ones and pulled out Picture #5. You can see the stockinette stitch curl even though I have a hem of 3 rows of crochet. Before I tell you what I did, I want to put in a plug of top-down knitting for garments. Most of the times, fixes occur at the bottom of the garment: too short, too long; too tight; rolling, etc. With top-down knitting, your bind off is at this bottom hem and any fix means just finding the yarn end at the bottom and unraveling. (OK, another tip while I'm at it: get a small notebook to use for all your projects. You can use it for elaborate notes including what pattern you are using but be sure to use it for at least this: yarn used and needle sizes used. This is so helpful when you have to alter a garment.)
 |
| #6 The pull out |
 |
| #7 All marked |
As you start to unravel the bottom of your garment, be sure to mark the first stitch of the round with a safety pin. Then, as in Picture #6, use a ruler to determine where you want the hem to start. (I like a long K1B, P1 rib so I'm going up about 5".)
Once you've determined how deep you want your hem, put your pin on the first stitch of that row (just travel up the garment from the original stitch you marked off) and unravel back to that round. Use a very small circular needle and pick up the stitches on that round. Transfer to the correct sized needle and work your new hem. I'm about two inches into the new hem in the top above and I'll post a picture next week.
OK, stick a fork in me, I'm done. Next week maybe I'll get some ideas for fall/winter knitting. See you then.
No comments:
Post a Comment