Capitalism - Feudalism
without the Kings
Tax the Rich
Knitting Friday
The devil came to see me yesterday. He reads my blog, so he says, and started the conversation this way:
Devil: I read you're going to discuss hems tomorrow.
Me: Yes, I am.
De: (feeling the pink textured top I'm working on): Do you think you're ready for that? Do you think you gave enough of an explanation of binding off/casting on underarm stitches?
Me: (thinking) Think so.
De: But don't you think that casting on these stitches without getting holes needs a very good explanation? After all, this is a big "Help Me, Please" topic on Ravelry.
De: (continues because I'm thinking): You know this top you're working on would be a great teaching prop. Your yoke is lace but at the armhole you changed to stockinette. Showing how to remove holes in stockinette is pretty easy.
Me: (finished thinking and having an answer, I hold up the top) Yeah, but look, I'm five inches past the underarm. I'm not going to rip back to the underarm just to have a lesson!
OK, now the Devil is thinking, silently, and for some strange reason I start to detect whiffs of fire and brimstone.
De: Hmmm. I guess you're right. Tinking back is a pain. OK, got to go....... Oh wait, what's that long thread where you bound off for the upper arm? It looks like you missed a stitch and it's unravelling. Gotta go. See 'ya.
And then I looked down and saw that for the first time in making over 50 of these tops, I had missed a stitch at the top of the armhole bind off and I was looking at a mess which was not going to be a simple fix.
So today, we are not going to have our hem demonstration but a preventing-holes-at-the-armhole demonstration. And, I can honestly say, the devil made me do this!
 |
| Yoke ready for armholes |
In the picture of the left, you see my typical top ready for armholes. I cast on 80 sts. then join and work about 1.5" in seed. Next row: *K front & back each st* across (160 sts) Change to US 10.5 and work about 5" in Row 1: *K* Row 2: *YO, K2tog*
On most of my tops, I would just continue in the above pattern after I work the armholes but I'm trying something different here. I'm going to start in straight stockinette for the body right after I bind off/cast on for the underarm.
Now, as the devil just said, the armholes get tricky because, try as you might, you almost always create two holes. You don't get the holes when you bind off for the top of the armhole but, on the next row, when you cast on your underarm stitches. I have no pictures for the top bind off because that's pretty typical unless you pull your stitches too tightly. Bad idea.
 |
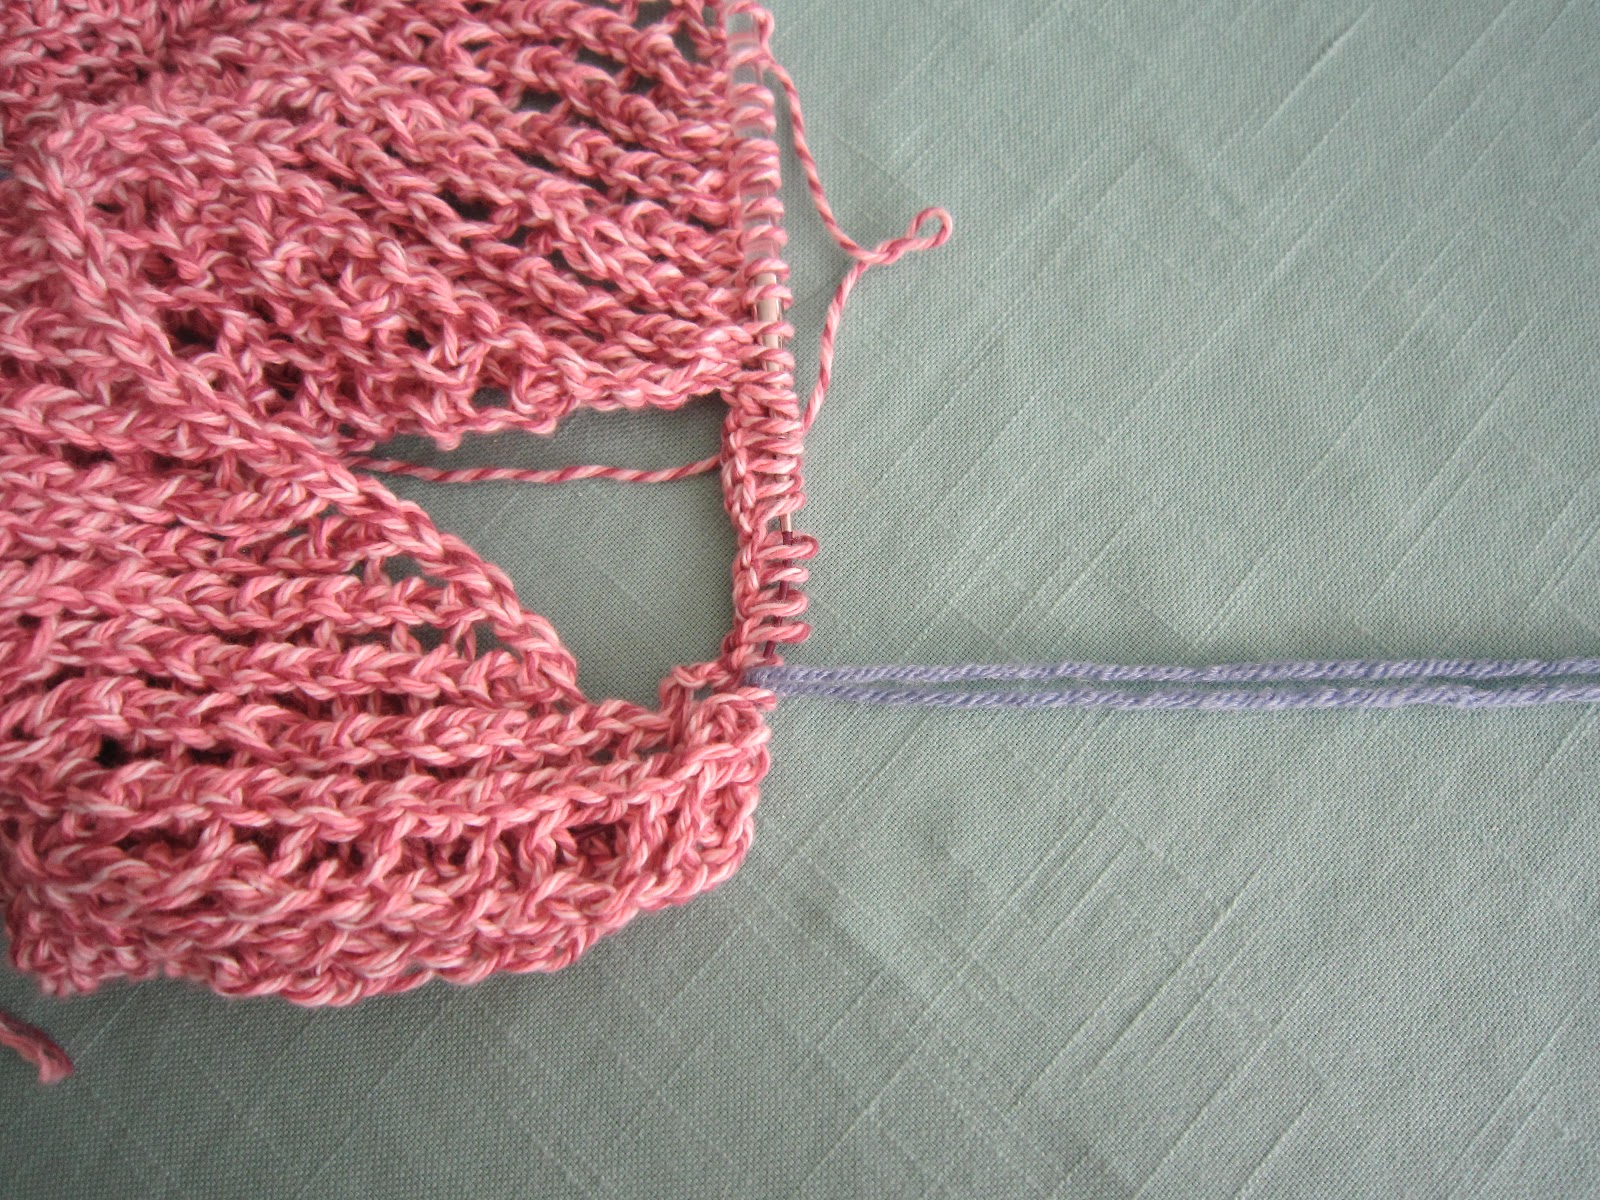
| Cast on for underarm |
Here's how I do my underarm cast on row. I've already done the row where I work across the back (50 sts), bind off for one armhole (30 sts), work across the front (50), and bind off for the second armhole (30). I've just started the next row by working across the back stitches (50) and I've reached the first armhole gap. Here's what I do next (see picture right). 1. Flip the top to the wrong side. 2. Mark the first stitch on the needle (for counting purposes.) 3. Insert a crochet hook between the first and second stitch on the needle, pull through a loop (see r. pic above) and put that loop on my needle. 3. Pulling the first loop and the last loop tightly when I place them on the needle, I work #3 for the number of stitches I need. 4. Then I count my cast on stitches.
 |
| Some stitches cast on |
 |
| All stitches cast on |
On the left, you see my marker and a few of the stitches cast on.
On the right, you see the marker and all the stitches cast on. The armhole, except for the holes, is good to go.
Left below, you can see the dreaded hole. Now, while the yoke pattern has holes, you can see in this picture that I've already worked one body row in stockinette stitch and this hole (marked by the hook) is part of the underarm cast on stitches, not the yoke pattern. It doesn't belong!
 |
| The hole! |
There are different ways to correct these holes and the most difficult is on an open pattern stitch since you don't want the hole fix to wonk-out the pattern. In that case, it may be best to find the loose hole stitches on the wrong side and gently, from the WS, pull them as taut as possible. You'll have a loop of yarn on the WS now which you can tack down with the same color sewing thread on that side.
 |
| Pin marks hole-fix new stitch |
But the stockinette stitch is more forgiving. Looking at this hole, above left, you can see a small horizontal bar just below the hole (and the hook.) Also, on the left side of the hole you can see three twisted stitches. What I did: 1. Using the crochet hook, I picked up the horizontal bar. 2. I separated the twisted stitch on the left and pulled the bar through one of them in stockinette fashion. 3. Then I put this new stitch on my needle. (This is all easier if you work one row before you start the fix. It helps you see the hole and gives you more stitches to work with.)
Above right, you can see this new stitch marked with a pin. While there is a hole below the pin to the right, it's a yoke pattern hole. "The hole!" is gone.
Keep that extra stitch marked so when you come across it on the next row, you would treat it as one with the next stitch and work them together (here I just K2tog) so your correct stitch count returns.
 |
| No more hole |
And finally at the left is the top after working a few rows. You can see the hole is gone. Happy days!
Postscript: Well, not quite happy days. After working a few body rows in stockinette, I realized that you can't work a lace yoke and the stockinette body with the same size needles since the lace is so much looser. So, as I type, the pink top lays here tinked back to the neckband. I'm going to work it again with the lace yoke in US 9 and the body in US 10.5.
Next week: I've already started taking pictures of hems on sweaters. See you then. Happy knitting.
No comments:
Post a Comment